Breaking News
Loading...
Showing posts with label Linux Hacking tricks & commands. Show all posts

Tuesday, 22 December 2015

Improved Features Of New Kali Linux 2.0 And How To Upgrade To It

kali-linux-2.0-features-upgrade-update- picateshacks.com


Kali 2.0 (Kali Sana) was released last week which means that we get to spend some time sifting through Offensive Security‘s latest release looking at all the new tools and tricks. Offensive Security promised us a better, more powerful penetration testing platform, and my preliminary look at 2.0 shows that they delivered.

Here is my previous article about kali linux 1.0: 
An Introduction To Hacker’s OS: Kali Linux Setup Tutorial

Kali Linux 2.0 (Kali Sana) is the best Penetration testing distribution,well organized and with core tools and packages needed by Pentester to get started right after installation. Kali Linux 2.0 will be a rolling distribution and updates will be pulled continuously from debian testing. Kali 2.0 is based on debian 8 and available in lots of flavors. Kali Linux 2.0 ( Kali Sana) natively supports different desktop environments like xfce,gnome3,kde, mate,lxde,e.t.c

The Look Of Kali Linux 2.0


kali-linux-2.0-features-upgrade-update- picateshacks.com

Kali 2.0 switched over to the GNOME3 interface which brings a much needed update to the user experence. This new UI gives you a customizable favorites bar, which will certainly come in handy, having your common tools at the ready at all times. The new Applications menu in the top bar comes with new, easier-to-understand groupings. This is wonderful if you’d like to have a quick glance at all of your available applications.

Better still, Kali 2.0 also natively supports KDE, Xfce, MATE, e17, lxde and i3wm so if you’re not a fan of the default, you can switch fairly easily to one that you’re more fond of.

The Tools


Kali 2.0 includes a variety of previously-unavailable-by-default toolset including Maltego,Responder from SpiderLabs, and a sleu of wireless penetration testing tools. All of these and more are accessible through the the multi-level navigation mentioned previously.

The Updates


One of my personal concerns with the previous version of Kali was that updates weren’t frequent enough and tools weren’t updated as often as they should. Kali 2.0 is now a rolling distribution, meaning more updates to both the operating system and the natively supported tools.

Improved Features of Kali Linux 2.0


This version of kali Linux is highly expected among the world. Because the teaser which was released by OPSC about this project became viral in internet. It was a 3.13 mins teaser which describes the new features added to the 2.0 version of this Kali Linux. Let’s see the new features added to this version of Kali Linux briefly.

1. Multi-Tasking :


kali-linux-2.0-features-upgrade-update- picateshacks.com
Multi Tasking Feature Seen at Right Side Of Desktop

It is the best feature of Kali Linux v.2.0 that I wish to mention here. It has multi taking feature such as android. The bitter truth is, the multi tasking feature in Kali Linux v.2.0 is better than they of multi tasking in android. It enables the user to run 10+ programs at instant. The experience of this feature depends upon the hardware of the system. All though it has multi tasking feature, making it perfect needs a good compeer or laptop with better specifications. Or else, it may not respond and led to force close of application. Whenever the usage of any feature exceeds, it leads to force close. This is common in all the operating system.

2. Redesigned User Interface :


kali-linux-2.0-features-upgrade-update- picateshacks.com

However the operating system is powerful, the interface and display gives the a user, a sense of exploit. Kali Linux always gives us that feel. This version has a redesigned user interface. This gives us a streamlined working experience. The user interface of this version is really awesome and provides you, a smooth exploiting experience.

3. Restructured Menu and Tool Categories:


kali-linux-2.0-features-upgrade-update- picateshacks.com

This adds beauty to this new version of llinux. Not only beauty, but also an feel of pentrstion testing.

4. Weekly Upstream Updates of Core Toolsets:


kali-linux-2.0-features-upgrade-update- picateshacks.com

 Users can either update it manually or automatically.
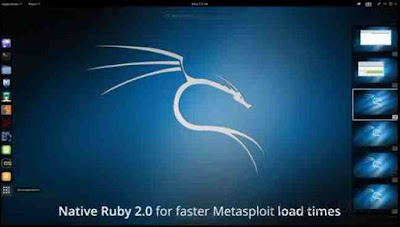
5. Native Ruby 2.0 Faster Metasploit Load Times :


kali-linux-2.0-features-upgrade-update- picateshacks.com

Metasploit is one of the best tool used in Kali Linux. Considering the usage of this Metasploit, Makers of this Linux had given some more importance for it’s performence. They had fixed minor bugs and made this Metasploit, a better tool for penetration testing.

6. Built in Desktop Notifications :


This is also one of the best feature found in this version. Users don’t have to install any secondary software or frameworks to get Desktop notifications as out comes inbuilt with the operating system. As same as in android, this version has a notification which can either enabled or disabled by the user. It means that it is customizable. It joins with the Multi taking feature and gives on time notifications so that user won’t miss any important things. User will get notifications whenever a process is started, completed, updated or changed.

7. Built in screen casting :


The users of this penetrating system do not have to depend on secondary software for on screen recording as Screen casting has become a inbuilt feature. This is a nice move by the Team Kali Linux. Most of the features were same as that of in android. It is better to note that android is Linux based. Especially this screen casting, notification and multi tasking features proves that, the features were based on the features of android operating system.
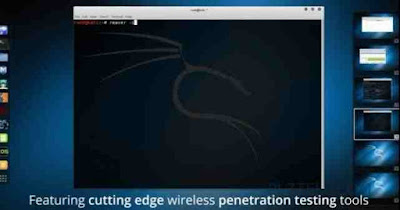
8. Cutting Edge Wireless Penetration Testing Tools :


kali-linux-2.0-features-upgrade-update- picateshacks.com

New Wireless Penetration Testing Tools were also included in this new version of Kali Linux. These tools run in terminal emulator. The main aspect of this tools are wireless penetration testing. Note that Wireless is different from remote. These tools are used for Wifi Cracking, Spoofing, Sniffing, and for other MITM attacks. This has made wireless Penetration testing, easier a lot that before.

How to upgrade to Kali Linux 2.0 (Kali Sana)


Some of you guys are still using Kali Linux 1.x and you wanna upgrade to Kali Linux 2.0 without full clean installation. Well, this can be done though the recommended way of getting Kali Linux 2.0 running smoothly is by performing full clean installation.

To upgrade to Kali Linux 2.0, you'll have to add Kali Sana repositories to your sources.list file, please don't append the kali sana repos, just overwrite existing repositories.

To do this just paste the following lines on your terminal:

cat << EOF > /etc/apt/sources.list
# Regular Repositories
deb http://http.kali.org/kali sana main non-free contrib
deb http://security.kali.org/kali-security sana/updates main contrib non-free
# Source repositories
deb-src http://http.kali.org/kali sana main non-free contrib
deb-src http://security.kali.org/kali-security sana/updates main contrib non-free
EOF

After adding repos, the next thing to do is system update and dist-upgrade, to do this type the following in terminal:
 sudo apt-get cleansudo apt-get updatesudo apt-get dist-upgradesudo reboot

If you want to do a fresh installation, head to download page:
Download Kali Linux ISO image

Then get the version of Kali Linux 2.0 that you need. Create a bootable flash drive by using dd command, example is shown below:
 dd if=/home/jose/Downloads/kali-linux-1.1.0-amd64.iso of=/dev/sdb bs=512k

Replace if='' With the location of your Kali Linux ISO image. The of option is the output file and specify the destination to write to, e.g /dev/sdb in our case above.

You can use the following command to know your flash drive mount location
 sudo fdisk -l

You'll get output similar to one below:

kali-linux-2.0-features-upgrade-update- picateshacks.com

If you are a windows guy, the download win32diskimager, install it and create bootable flash disk. You can also make bootable DVD and boot kali off of it.

Final words


Basically, Offensive Security did a bang-up job upgrading the look and feel of Kali to something more modern and usable. I moved away from Kali 1.0 over the course of its life-cycle due to update and compatibility issues. Of course, as a pentester, logging in and opening a terminal minimizes the importance of the shiny UI (but it is a pretty nice upgrade). Thankfully, regular updates for both the tools and the operating systems are going to be pushed, and for the time being, I will be using Kali 2.0 as my main pentesting platform.

Nmap Tutorial: How To Hack ADSL Router Using NMAP Tool

Hack ADSL Router Using NMAP- picateshackz.com

Asynchronous digital subscriber line (DSL or ADSL) modem is a device used to connect a computer or router to a telephone line which provides the digital subscriber line service for connectivity to the Internet, which is often called DSL or ADSL broadband. In this guide I will show you show you how to scan IP range for connected ADSL or DSL modem routers and find DSL ADSL router hack remotely. This guide applies to Windows, Linux or Mac, so it doesn’t matter what’s your Operating system is, you can try the same steps from all these operating systems. The term DSL or ADSL modem is technically used to describe a modem which connects to a single computer, through a USB port or is installed in a computer PCI slot. The more common DSL or ADSL router which combines the function of a DSL or ADSL modem and a home router, is a standalone device which can be connected to multiple computers through multiple Ethernet ports or an integral wireless access point. Also called a residential gateway, a DSL or ADSL router usually manages the connection and sharing of the DSL or ADSL service in a home or small office network.
Put this together with Wireshark hacking for http websites, you got a nightmare for the user behind that router as all their passwords and details can be tracked very easily.

What’s in a DSL ADSL Router?

A DSL or ADSL router consists of a box which has an RJ11 jack to connect to a standard subscriber telephone line. It has several RJ45 jacks for Ethernet cables to connect it to computers or printers, creating a local network. It usually also has a USB jack which can be used to connect to computers via a USB cable, to allow connection to computers without an Ethernet port. A wireless DSL or ADSL router also has antennas to allow it to act as a wireless access point, so computers can connect to it forming a wireless network. Power is usually supplied by a cord from a wall wart transformer. It usually has a series of LED status lights which show the status of parts of the DSL or ADSL communications link:
  1. Power light – indicates that the modem is turned on and has power.
  2. Ethernet lights – There is usually a light over each Ethernet jack. A steady (or sometimes flashing) light indicates that the Ethernet link to that computer or device is functioning
  3. DSL or ADSL light – a steady light indicates that the modem has established contact with the equipment in the local telephone exchange (DSL or ADSLAM) so the DSL or ADSL link over the telephone line is functioning
  4. Internet light – a steady light indicates that the IP address and DHCP protocol are initialized and working, so the system is connected to the Internet
  5. Wireless light – only in wireless DSL or ADSL modems, this indicates that the wireless network is initialized and working
Almost every ADSL DSL modem router provides a management web-page available via Internal network (LAN or Local area network) for device management, configuration and status reporting. You are supposed to login to the management web-page, configure a username password combination provided by your ISP (Internet service provider) which then allows you to connect to internet. The network is divided into two parts:

External Network

External network indicates the part where ADSL DSL modem routers connects to upstream provider for internet connectivity. Once connected to the ISP via a Phone line (ADSL DSL Modem routers can use conventional Copper Phone lines to connect to ISP at a much higher speed), the router gets an IP address. This is usually a Publicly routable IP address which is open to the whole world.

Internal Network

Internal network indicates the part where devices in Local Area Network connects to the ADSL DSL modem router via either Wireless or Ethernet cable. Most modem DSL ADSL Modem routers runs a DHCP server internally which assigns an Internall IP address to the connected device. When I say device, this can be anything from a conventional computer, a laptop, a phone (Android, Apple, Nokia or Blackberry etc.), A smart TV, A Car, NAS, SAN, An orange, A banana, A cow, A dragon, Harry Potter … I mean anything that’s able to connect to internet! So you get the idea. Each device get’s it’s own IP address, a Gateway IP and DNS entries. Depending on different DSL ADSL Modem router, this can be slightly different, but the idea remains the same, the DSL ADSL Router allows users to share internet connectivity. These DSL ADSL Modem Routers are like miniature Gateway devices that can have many services running on them. Usually they all use BusyBox or similar proprietary Linux applications on them. You want to know what a DSL ADSL Router can do? Here’s a list of common services that can run on a DSL ADSL Modem Router:
  1. ADSL2 and/or ADSL2+ support
  2. Antenna/ae (wireless)
  3. Bridge/Half-bridge mode
  4. Cookie blocking
  5. DHCP server
  6. DDNS support
  7. DoS protection
  8. Switching
  9. Intrusion detection
  10. LAN port rate limiting
  11. Inbuilt firewall
  12. Inbuilt or Free micro-filter
  13. Java/ActiveX applet blocking
  14. Javascript blocking
  15. MAC address filtering
  16. Multiple public IP address binding
  17. NAT
  18. Packet filter
  19. Port forwarding/port range forwarding
  20. POP mail checking
  21. QoS (especially useful for VoIP applications)
  22. RIP-1/RIP-2
  23. SNTP facility
  24. SPI firewall
  25. Static routing
  26. So-called “DMZ” facility
  27. RFC1483 (bridged/routed)
  28. IPoA
  29. PPPoE
  30. PPPoA
  31. Embedded PPPoX login clients
  32. Parental controls
  33. Print server inbuilt
  34. Scheduling by time/day of week
  35. USB print server
  36. URL blocking facility
  37. UPnP facility
  38. VPN pass-through
  39. Embedded VPN servers
  40. WEP 64/128/256 bit (wireless security)
  41. WPA (wireless security)
  42. WPA-PSK (wireless security)
That’s a lot of services running on a small device that are configured by nanny, granny, uncle, aunt and the next door neighbour, in short many non technical people around the world. How many of those configured badly? Left ports open left right and center? Didn’t change default admin passwords? Many! I mean MANY! In this guide we will use namp to scan a range of IP addresses, from output we will determine which are DSL ADSL Routers and have left their Management ports open to External Network. (again read top section to know which one is a external network). A typical ADSL Router’s Management interface is available via following URL:
http://10.0.0.1/
http://192.168.0.1/
http://192.168.1.1/
http://192.168.1.254/
etc.
This is the Management page for DSL ADSL modem router and it’s always protected by a password. By default, this password is written below a DSL ADSL modem router in a sticker and they are one of these combinations: Username/Password
admin/admin
admin/password
admin/pass
admin/secret
etc.
A lot of the home users doesn’t change this password. Well, that’s ok. It doesn’t hurt much cause this is only available via a connected device. But what’s not OKAY is when users open up their management to the external network. All you need to know what’s the Public IP address for your target and just try to access this management page externally.

Installing NMAP

I use Kali Linux which comes with NMAP Preinstalled. If you are using Windows or Mac (or any other flavour of Linux) go to the following website to download and install NMAP.

Linux Installation:

For Ubuntu, Debian or aptitude based system NMAP is usually made available via default repository. Install NMAP using the following command:
sudo apt-get install nmap

For YUM Based systems such as Redhat, CentOS, install via
sudo yum install nmap

For PACMAN based systems such as Arch Linux, install via
sudo pacman -S nmap

Windows Installation:

For Windows Computers, download installer and run the executable. Link: http://nmap.org/dist/nmap-6.46-setup.exe

Mac Installation:

For Mac users, download installer and install Link: http://nmap.org/dist/nmap-6.46.dmg

Official NMAP site

You can read more about NMAP here: http://nmap.org/

Search for Vulnerable Routers

Now that we have NMAP sorted, we are going to run the following command to scan for ADSL Modem Routers based on their Banner on Port 80 to start our ADSL router hack. All you need is to pick an IP range. I’ve used an example below using 101.53.64.1/24 range.

Search from Linux using command Line

In Linux run the following command:
nmap -sS -sV -vv -n -Pn -T5 101.53.64.1-255 -p80 -oG - | grep 'open' | grep -v 'tcpwrapped'


In Windows or Mac open NMAP and copy paste this line:
nmap -sS -sV -vv -n -Pn -T5 101.53.64.1-255 -p80 -oG -
Once it finds the results, search for the word ‘open’ to narrow down results. A typical Linux NMAP command would return outputs line below: (and of course I’ve changed the IP details)
Host: 101.53.64.3 ()  Ports: 80/open/tcp//tcpwrapped///
Host: 101.53.64.4 ()  Ports: 80/open/tcp//http//micro_httpd/
Host: 101.53.64.9 ()  Ports: 80/open/tcp//tcpwrapped///
Host: 101.53.64.19 () Ports: 80/open/tcp//tcpwrapped///
Host: 101.53.64.20 () Ports: 80/open/tcp//http//Fortinet VPN|firewall http config/
Host: 101.53.64.23 () Ports: 80/open/tcp//tcpwrapped///
Host: 101.53.64.31 () Ports: 80/open/tcp//http?///
Host: 101.53.64.33 () Ports: 80/open/tcp//tcpwrapped///
Host: 101.53.64.35 () Ports: 80/open/tcp//http?///
Host: 101.53.64.37 () Ports: 80/open/tcp//http?///
Host: 101.53.64.49 () Ports: 80/open/tcp//http//Gadspot|Avtech AV787 webcam http config/
Host: 101.53.64.52 () Ports: 80/open/tcp//http?///
Host: 101.53.64.53 () Ports: 80/open/tcp//ssl|http//thttpd/
Host: 101.53.64.58 () Ports: 80/open/tcp//http?///
Host: 101.53.64.63 () Ports: 80/open/tcp//tcpwrapped///
Host: 101.53.64.69 () Ports: 80/open/tcp//http//Gadspot|Avtech AV787 webcam http config/
Host: 101.53.64.73 () Ports: 80/open/tcp//http//Allegro RomPager 4.07 UPnP|1.0 (ZyXEL ZyWALL 2)/
Host: 101.53.64.79 () Ports: 80/open/tcp//http//Apache httpd/
Host: 101.53.64.85 () Ports: 80/open/tcp//http//micro_httpd/
Host: 101.53.64.107 ()        Ports: 80/open/tcp//http?///
Host: 101.53.64.112 ()        Ports: 80/open/tcp//http?///
Host: 101.53.64.115 ()        Ports: 80/open/tcp//tcpwrapped///
Host: 101.53.64.123 ()        Ports: 80/open/tcp//tcpwrapped///
Host: 101.53.64.129 ()        Ports: 80/open/tcp//http//Allegro RomPager 4.07 UPnP|1.0 (ZyXEL ZyWALL 2)/
Host: 101.53.64.135 ()        Ports: 80/open/tcp//tcpwrapped///
Host: 101.53.64.145 ()        Ports: 80/open/tcp//http//micro_httpd/
Host: 101.53.64.149 ()        Ports: 80/open/tcp//http//Microsoft IIS httpd 6.0/
Host: 101.53.64.167 ()        Ports: 80/open/tcp//tcpwrapped///
Host: 101.53.64.170 ()        Ports: 80/open/tcp//http//Allegro RomPager 4.07 UPnP|1.0 (ZyXEL ZyWALL 2)/
Host: 101.53.64.186 ()        Ports: 80/open/tcp//http?///
Host: 101.53.64.188 ()        Ports: 80/open/tcp//tcpwrapped///
Host: 101.53.64.193 ()        Ports: 80/open/tcp//tcpwrapped///
Host: 101.53.64.202 ()        Ports: 80/open/tcp//http//Apache httpd 2.2.15 ((CentOS))/
Host: 101.53.64.214 ()        Ports: 80/open/tcp//tcpwrapped///
Host: 101.53.64.224 ()        Ports: 80/open/tcp//http//Allegro RomPager 4.51 UPnP|1.0 (ZyXEL ZyWALL 2)/
This was taking a long time (we are after all try to scan 256 hosts using the command above). Me being just impatient, I wanted to check if my Kali Linux was actually doing anything to ADSL router hack. I used the following command in a separate Terminal to monitor what my PC was doing… it was doing a lot …
tcpdump -ni eth0


That’s a lot of connected hosts with TCP Port 80 open. Some got ‘tcpwrapped’ marked on them. It means they are possibly not accessible.

Search from Windows, Mac or Linux using GUI – NMAP or Zenmap

Assuming you got NMAP installation sorted, you can now open NMAP (In Kali Linux or similar Linux distro, you can use Zenmap which is GUI version of NAMP cross platform). Copy paste the following line in Command field
nmap -sS -sV -vv -n -Pn -T5 101.53.64.1/26 -p80 -oG -
another version of this command is using different representation of Subnet MASK.
nmap -sS -sV -vv -n -Pn -T5 101.53.64.1-255 -p80 -oG -
Press SCAN Button and wait few minutes till the scan is over.

Once you have some results, then you need to find the open devices with open ports. In search Result page:
  1. Click on Services Button
  2. Click on http Service
  3. Click on Ports/Hosts TAB (Twice to sort them by status)
As you can see, I’ve found a few devices with open http port 80.

It is quite amazing how many devices got ports open facing outer DMZ.

Access Management Webpage

Pick one at a time. For example try this:
http://101.53.64.3
http://101.53.64.4
http://101.53.64.129

You get the idea. If it opens a webpage asking for username and password, try one of the following combinations:
admin/admin
admin/password
admin/pass
admin/secret

If you can find the Router’s model number and make, you can find exact username and password from this webpage:http://portforward.com/default_username_password/ Before we finish up, I am sure you were already impatient like me as a lot of the routers had ‘tcpwrapped’ on them which was actually stopping us from accessing the web management interface to ADSL router hack. Following command will exclude those devices from our search. I’ve also expanded my search to a broader range using a slightly different Subnet MASK.
nmap -sS -sV -vv -n -Pn -T5 101.53.64.1/22 -p80 -oG - | grep 'open' | grep -v 'tcpwrapped'

In this command I am using /22 Subnet Mask with 2 specific outputs: I am looking for the work ‘open’ and excluding ‘tcpwrapped’ on my output. As you can see, I still get a lot of outputs.

Final Words

You’ll be surprised how many have default username and passwords enabled. Once you get your access to the router, you can do a lot more, like DNS hijacking, steal username and passwords (for example: Social Media username passwords (FaceBook, Twitter, WebMail etc.)) using tcpdump/snoop on router’s interface and many more using ADSL router hack … Why did I write this guide?  Here’s one for example:

As you can see Jhefeson probably has a legitimate reason to try and reboot this shared router, but he can’t just because he doesn’t have physical access to it. If this guide works, he can actually get access back.
There’s many things you can do after you’ve got access to a router. You can change DNS settings, setup a tcpdump and later snoop all plaintext passwords using wireshark etc. If you know a friends, family. colleague or neighbor who didn’t change their routers default password, let them know of the risks.
But I am not here to judge whether it should be done or not, but this is definitely a way to gain access to a router. So hacking is not always bad, it sometime is required when you loose access or a system just wouldn’t respond. As a pentester, you should raise awareness. Share this guide as anyone who uses a Linux, Windows, Mac can use this guide to test their own network and fix ADSL router hack issue.